Search This Blog

Sunday, April 10, 2011

Dahi Bhindi


Ingredients:

5 medium sized bhindi (okra/lady's finger)
1 tsp of oil
1/4 tsp salt
4 tsp water

for the tempering

1 tsp oil
1/2 medium sized onion, finely chopped
1 red chilly whole
1/2 small sized tomato, finely chopped
1/4 tsp urad dal, washed and soaked
1/4 tsp mustard seeds
5 curry leaves
1/4 tsp haldi

for the paste

5 cashew
1/4 cup grated coconut
1/4 cup dahi
1/4 cup water
salt to taste

Method:

  • wash the bhindi and pat dry. Cut each bhindi horizontally into 2 to get 10 pieces.
  • wash and soak the urad dal in 1 tbsp of water for 10 mins. Drain before using.
  • heat a kadai and add 1/2 tsp of oil. Heat the oil on a medium flame. Add the bhindi and stir, turn the flame on sim and close the lid, stir occasionally and keep adding 1 tsp of water at a time if required. Once the bhindi is cooked, turn the flame off.
  • grind together cashew and coconut into a fine paste.
  • mix curd to the cashew and coconut paste.
  • heat a kadai. Add 1 tsp of oil. Add black mustard seed, when they splutter add the whole red chilli, urad dal and curry leaves. Cook till urad dal changes its colour. Add onion and saute. Add tomato and haldi and cook for two mins on medium low flame.
  • once the tomato is cooked turn the gas off. Add 1 tbsp of water and mix well. Add the curd and coconut paste and mix well for a min. Add 1/4 cup of water and mix well.
  • switch on the flame and cook the gravy on a low flame. Add salt to taste.
  • cook the gravy to desired consistency. Add the fried bhindi, simmer for a minute. Switch off and serve hot.
Tips:

  • you can also add hing to the tempering.
  • you can also add garlic and ginger paste along with the onion.
  • if the dahi is sour tomatoes can be avoided.
  • it is very important to mix cashewnut paste to the curd, this prevents the curd from cuddling.
  • this gravy thickens when it comes to room temperature, accordingly switch off the flame at a slightly thinner consistency than you actually desire.
  • it is very important to get the pan off the flame and add a little bit of water before you add the curd mixture. This helps to prevent curd from cuddling.
  • if you want a thicker gravy, reduce the amount of water added to the curd. Alternatively, you can increase the number of cashewnuts.
  • you can 1/4 tsp of sugar to balance the flavours.
  • you can also deep fry the bhindi. Add 1 tsp of cornflour to the bhindi and deep fry, it will result in crispy bhindi.
  • you can keep the bhindi soft or crispy as per your taste.
  • if you keep the bhindi crispy then do not cook the crispy bhindi in the gravy instead mix it with the gravy just before serving.
  • you can sustitude the bhindi with fried brinjal,cauliflower, potato etc.
  • this gravy tastes good with rotis, paratha or malabari paratha!

Saturday, April 9, 2011

Aamer dal


Ingredients:

1/4 cup dhooli masur dal
1 3/4 cup water
1/4 tsp haldi
1 green chilli slit into two
1/2 medium sized raw mango

for the tempering

1 tsp oil
1/4 tsp kalonji
1/2 tsp sugar
1/4 tsp coriender

Method:

  • peel the raw mango and cut it into thick 4 slices.
  • wash the dal and keep aside.
  • In a cooker add the washed dal, sliced raw mango, green chilli, 1 cup water, haldi and salt. Close the cooker and cook on medium flame till one whistle, sim the gas and cook for 3 mins and turn the gas off. let the pressure drop by itself.
  • for the tempering, heat a kadai, add oil on medium flame. Add kalonji, when it crackles, add the cooked dal and 3/4 cup of water, bring the dal to a boil on medium flame. Add sugar and coriander.
  • boil for 1 min and turn off the gas.
  • serve hot.

Tips:

  • you can add combination of moong and masur dal.
  • this dal is very good for summers.
  • you can use ghee for the tempering instead of oil. you can also use combination of ghee and oil.
  • if the raw mango is too sour increase the quantity of sugar.
  • sugar can be substituted with jaggery.
  • when you add water to cooked dal always add hot or luke warm water.
  • incase you want more spice add 1 green chilli in the tempering.
  • you can add 1 full small peeled raw mango, if you like to have the seed of the mango.
  • the mango pieces should retain their shape after it is cooked hence do not over cook. For this preparation, the dal also should not be in a mashed form after it is cooked hence do not overcook the dal.
  • if you like the dal to be cooked much more, cook the dal after the tempering. Cooking it in the cooker will overcook the raw mango and the raw mango will get mashed in the dal. Alternatively you can cook the dal to one whistle, release the pressure and then add raw mango and cook it for another whistle.Alternatively,you can also soak the dal for sometime.
  • recipe given above is good for 2 serving.
  • serve this dal with plain rice!

Perval Bhaja


Ingredients:

4 perval
1/4 tsp haldi
1 1/2 tsp oil
salt to taste

Method:

  • peel the perval with a blunt knife.
  • cut the sides of the perval and make incision of cross mark on it.
  • make incisions on the perval (i make leaf designs on it as it makes it more appealing).
  • apply salt and haldi on the perval and let it marinate for 15-20 mins.
  • heat a flat non stick pan to medium heat. Add oil and place the perval on the pan. turn the flame to sim and cover the pan with a lid. let the perval cook on a slow flame, turn occasionally.
  • once the perval is done turn off the flame and serve these juicy perval.


Tips:

  • ensure that the slits are deep so that it marinates the flesh of the perval.
  • the perval can also be deep fried.
  • you can add other spices like jeera, coriander and red chilli powder after the perval is half done.
  • you can get your creativity running, make incisions of any design to make the perval look appealing!

Tadka Masala Raita


Ingredients:

1 cup dahi (curd)
1/4 tsp roasted jeera powder
black salt to taste
salt to taste

for the tempering

1 tsp mustard seeds
1 clove of garlic
1 tbsp finely chopped onion
1/4 tsp haldi
1/4 tsp red chilli powder
1 tsp coriander finely chopped

Method:

  • mix black salt, jeera powder and salt into the dahi.
  • heat the pan for tadka. Add oil, when the oil is heated add mustard seeds, when the mustard seeds crackle, add garlic and onion. cook on medium heat till the garlic and onion turn brown in colour, add haldi and mix well.
  • switch off the flame and add red chilli powder and coriander leaves. let it rest for a min.
  • add the tempering to the curd and mix well.
Tips:

  • you could vary the quantity of the spices mentioned above.
  • you could also add mint powder or black pepper powder to the curd.
  • red chilli powder should be added to the tempering after switching off the gas or else the red chilli powder will get brunt. the heat in the pan will be good enough.
  • let the tempering cool a bit before mixing it with the curd otherwise it can cuddle the curd.
  • this raita can be served chilled.
  • you can add a pinch of sugar to enhance the flavours.
  • after you transfer the tempering on to the curd put 1 tsp of water or curd in the tadka pan and pour it over the curd so that the spices are completely transferred into the curd.
  • this raita can be served as an accompaniment to parathas, chillas, rice etc.

Friday, April 8, 2011

Matar Paratha


Ingredients:

1/2 cup fresh green peas(80gms)
1/2 medium onion finely chopped
1 clove garlic
1 green chilli finely chopped
1/2 tsp jeera powder
1/2 tsp coriander powder
1/2 tsp haldi powder
1/2 tsp red chilli powder (optional)
2 tsp oil
salt to taste

1/2 cup whole wheat flour
water as required

Method:

  • knead the whole wheat flour with water to make a very soft dough. Cover and let the dough rest for 20 mins.
  • boil peas in 1 cup of water and 1/4 tsp of salt. Drain and keep it aside.
  • heat a kadai and add 2 tsp of oil. once the oil is heated add the garlic and stir well, add the onions and saute the onions on medium flame till it turns soft and translucent in colour.
  • mix haldi, jeera powder, coriander powder and red chilly powder with 1 tbsp of water and add to the onion. saute the onion mixture for about a minute.
  • after the masala is cooked add the boiled green peas. Season with salt.
  • mash the green peas and let the mixture cook for 3-5 mins.Turn off the flame and let the stuffing cool. Once the stuffing has been cooled divide it into three parts.
  • place the tawa on the gas and heat it on a medium flame.
  • After the dough has been rested for a min of 20 mins knead it once again.
  • make 3 balls of the dough
  • roll one ball into a size of small puri, put one portion of the stuffing into the puri and close all the sides to make a ball. gently press the dough stuffed with the filling to get a size of small puri.
  • place the stuffed puri and roll it with the help of a rolling pin. roll it gently so that the stuffing is evenly spread in the paratha. use dry flour if required.
  • put the stuffed paratha on the tawa and cook it till it turns golden brown on both the sides.repeat the same procedure with other two balls of dough.
  • serve hot with butter.
Tips:

  • kneading the dough to the right texture is extremely important.
  • for a stuffed paratha the dough should be as soft as possible. The water used in kneading a dough for stuffed paratha is more than for normal paratha dough.
  • when kneading the dough keep adding 1 tbsp of water at a time, till the dough is very soft and elastic.
  • you can add 1/4 tsp of salt to the dough while kneading.
  • you can add 1 tbsp of milk while kneading the dough to make the dough soft.
  • you can avoid garlic and onion in the stuffing.
  • see that you do not completely mash the peas. flatten some so that they can be seen when you roll out the paratha.
  • you may apply ghee/oil or a combination of both while cooking the paratha.
  • non stick tawa may be used, it would decrease the quantity of the fat used while cooking the paratha.
  • if the stuffing turns very dry and sticks to the pan at any stage just add 1 tsp of water and mix.
  • if you have used too much of dry flour for rolling the paratha just play with the paratha with your palms to dust the excess dry flour before putting the paratha on the tawa.
  • if you have to make parathas in bulk, cook the parathas till it is light brown in colour and stack them, just before serving apply ghee and cook it on both the sides and serve.
  • you can have the parathas crispy or soft.
  • the above recipe would make 3 parathas of 8 inch diameter.
  • serve the paratha with ghee, butter, chutney, raita or even just sauce!!!!

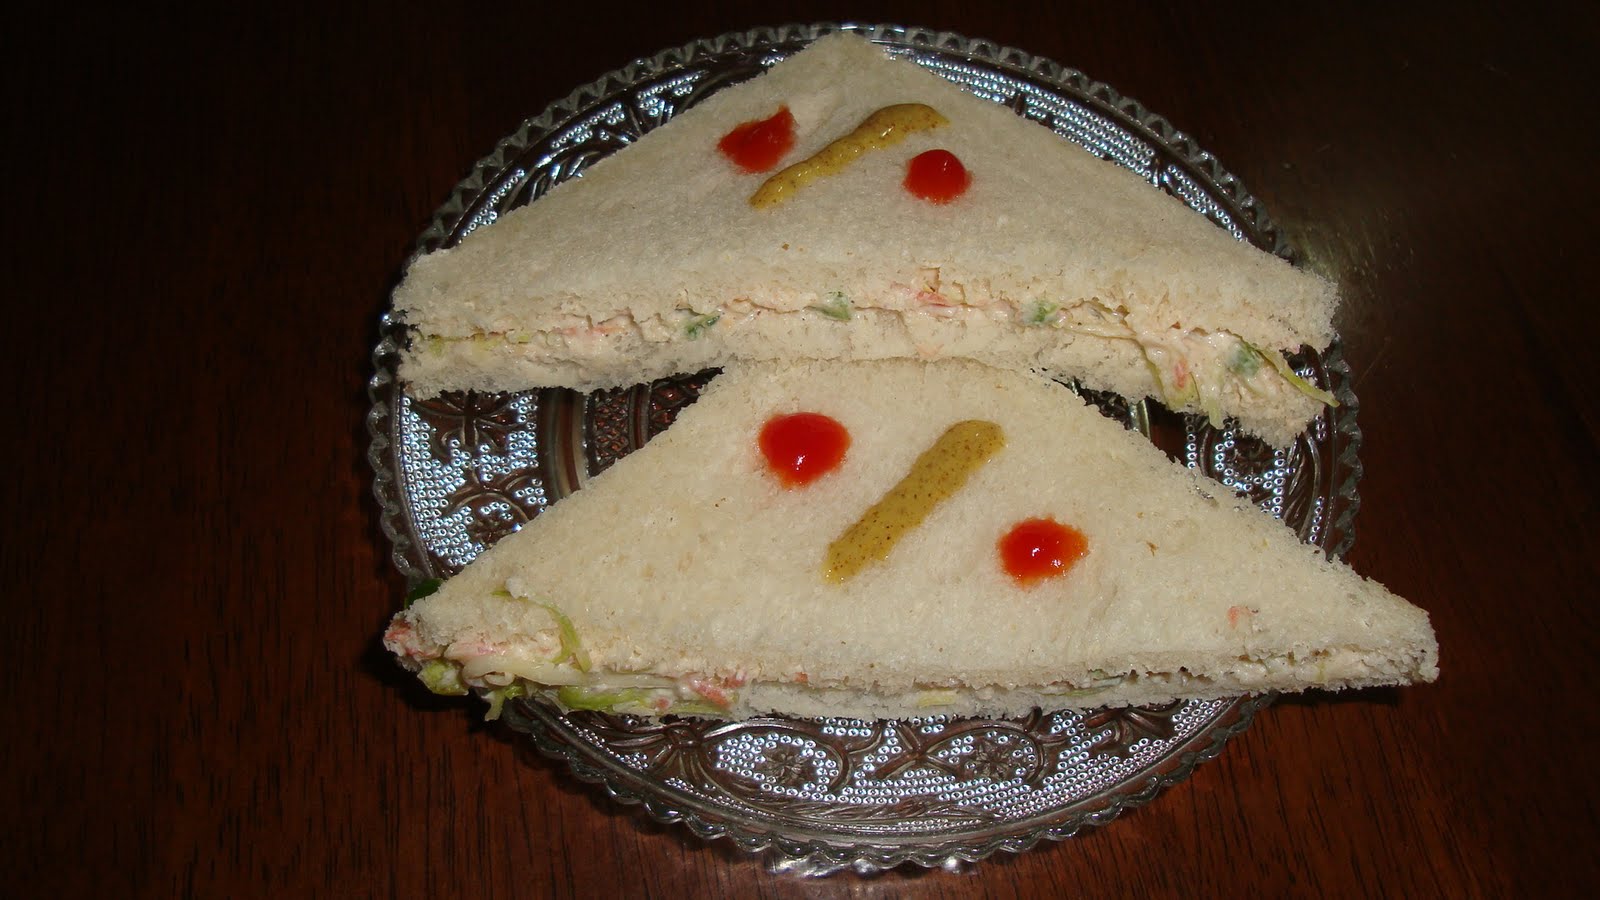
Vegetable Curd Sandwich


Ingredients:

2 slice of bread
1/4 carrot finely grated
1/4 capsicum finely chopped
1 leaf of cabbage finely shredded
1 1/2 tbsp of hung curd (dahi)
1 tsp of mustard sauce
1 tsp of tomato ketchup
1 tsp of pepper powder
salt to taste

Method:

  • mix hung curd, mustard sauce, tomato ketchup and pepper powder.
  • Add cabbage, carrot, capsicum to the curd mixture. Add salt to taste and mix well.
  • spread the curd mixture on one side of the slice bread and cover it with the other slice.
  • cut the sides of the sandwich and cut it into two triangle.
  • serve with mustard sauce.
Tips:

  • this sandwich can be had cold. however before refrigerating ensure that its airtight by covering it with cling flim, aluminium foil, zip lock or airtight tiffin box.
  • you could also add 1/2 tsp of olive oil to the stuffing.
  • the said dressing of hung curd, mustard sauce, tomato sauce could be varied to make a dressing for salad.
  • you could also add 1/2 tsp of lemon juice to enhance the flavours.
  • you could dry roast the mustard seeds and coarsely grind it and use it instead of the mustard sauce.
  • the vegetables given above could be changed according to your taste.
  • to prepared hung curd tie the curd in a muslin cloth for twenty minutes. will shortly post the recipe.
  • this sandwich can also be had grilled.
  • in case you wish to consume the sandwich after some time-gap from the preparation, you could apply butter to the slice, this will ensure that the slice bread does not turn soggy.
  • if you are making this sandwich for immediate consumption then add the salt to the mixture just before spreading.
  • if you are not making the sandwich for immediate consumption but to be had after sometime, add salt to the vegetables and let the vegetables sweat for sometime. squeeze the water and then add the curd mixture to the vegetables.
  • this sandwich can be served with mustard sauce or tomato ketchup.

Thursday, April 7, 2011

Quick Uttapam


Ingredients:

for the Uttapam

1 cup sooji (semolina/rawa)
1 cup dahi (curd)
1/4 cup water
oil to make the uttapam
salt to taste

for the Topping

1 big sized onion
6 green chillies

coriander to garnish

Method:

  • Mix the sooji and dahi. Mix it well to form a thick batter and keep the batter to rest for about 1/2 hour.
  • heat the tawa on a medium heat. sprinkle 1/2 tsp of oil on the tawa ,within 15 seconds wipe it with a tissue paper.
  • for making the uttapam, mix the batter and add water and salt. Give the batter a good stir.
  • spread the batter on the tawa. Make two uttapams at a time of 6 inch diameter each.
  • sprinkle onion, green chilli and coriander on the Uttapam. Put 1/2 tsp of oil on the sides of the uttapam and top of the uttapam. After the uttapam is done on one side flip on to the other side.
  • turn the uttapam once and for all and turn the flame to high for a min and remove the uttapam off the flame.
  • serve with sambar, chutney or even raita!!!

Tips:

  • tomato or any other vegetable of your choice could also be added for the topping.
  • if you like the onions to be caramelised then cook the topping for a slightly longer time. Avoid using coriander in this case.
  • you could spread 1/2 tsp of ghee instead of oil while the uttapam is cooking or after cooking it to give it rich flavour.
  • you could add 1/2 tsp of soda-bi- carb to the batter just before spreading the uttapam. However, i feel the result of the method I have given above is also good.
  • the batter mixture should be of thick coating consistency, if required you could add more water to get the right consistency.
  • if the curd is sour it gives a good fermented taste to the uttapam. However, fresh curd could also be used.
  • non-stick tawa gives good result.
  • ensure that the tawa is hot enough before spreading the batter. the tawa should be at a medium heat.
  • sprinkle some water on the tawa to check the temperature of the tawa. if the tawa is too hot sprinkle more water to bring down the temperature of the tawa.
  • uttapam must be cooked on low to medium low flame.
  • you could make one big uttapam. However, I make two at a time of 6 inch each or 4 uttapams of 4 inch each (mini uttapam) on the dosa tawa. Mini uttapam are good for evening snacks for kids.
  • the above recipe makes 6 uttapams of 6 inch diameter.
  • while making the second batch of uttapam, just pour a drop of oil on the tawa and wipe it with a tissue paper. Alternatively, you could wipe the tawa with a cloth dipped in salt water.
  • I feel that if the sooji Uttapam has good topping it could also be served with raita. i have served with garlic raita (will post the recipe soon!).
  • these uttapam could also be served with tomato ketchup or even raita!!!